This tutorial can be applied to PogamutUT2004 and will mostly hold for PogamutUDK examples.
This example is installed by Pogamut UT2004 installer. In NetBeans click New Project -> Maven -> Project From Archetype -> Local Archetypes Catalog and select 01-responsive-bot-archetype project. Moreover, as Pogamut 3 has been fully mavenized you can try and run this example even without installing the Pogamut NetBeans plugin. However in that case you won't be able to use visualization as this is a part of Pogamut NetBeans plugin. To open up this example in NetBeans follow up the steps in Opening Pogamut Examples chapter (if the archetype is not present, follow adding new Pogamut example project guide). This archetype information is below.
For UT2004 example:
-
cz.cuni.amis.pogamut.ut2004.examples
-
01-responsive-bot-archetype
-
3.3.0
-
http://diana.ms.mff.cuni.cz:8081/artifactory/repo
For UDK example only change to cz.cuni.amis.pogamut.udk.examples and 3.2.5-SNAPSHOT . The rest remains the same.
You will find up-to-date list of available archetypes in Pogamut Maven archetypes catalog
In previous tutorial we have shown how to issue commands using
IAct interface or by command modules (body). In this tutorial we will learn how
to create a simple bot that will be able to sense the surrounding world
and to react to several kinds of events that can occur. The bot behavior will be completely event-driven,
i.e., we won't utilize logic() method.
The events we will react to are:
-
someone/something hit the bot (bumps to it) – bot will move in an opposite direction
-
player appeared in bot's field of view – bot will greet the player
-
player approached the bot – bot will ask him, what does the player want
-
bot was injured – he will try to run away
To handle these events we have to have some mechanism that will notify us about changes in the environment. In general, there are two+one ways how the bot can detect a change:
-
actively check state of given object
-
register a listener and wait until the change occurs
-
utilize method annotations and let the listeners be registered automatically using Java Reflection API, note that this method is similar to previous one but is more convenient (easier to use)
The listener design pattern should be used in favour of active waiting since it is usually more computationaly effective. However sometimes the underlying API doesn't provide a way for registering listeners on every possible event so active waiting is the only choice, this is usually true for all custom variables you declare inside your bot as Java does not allow you to sense changes on arbitrary variable. This tutorial present only the last two approaches, i.e., how to utilize listeners to various events.
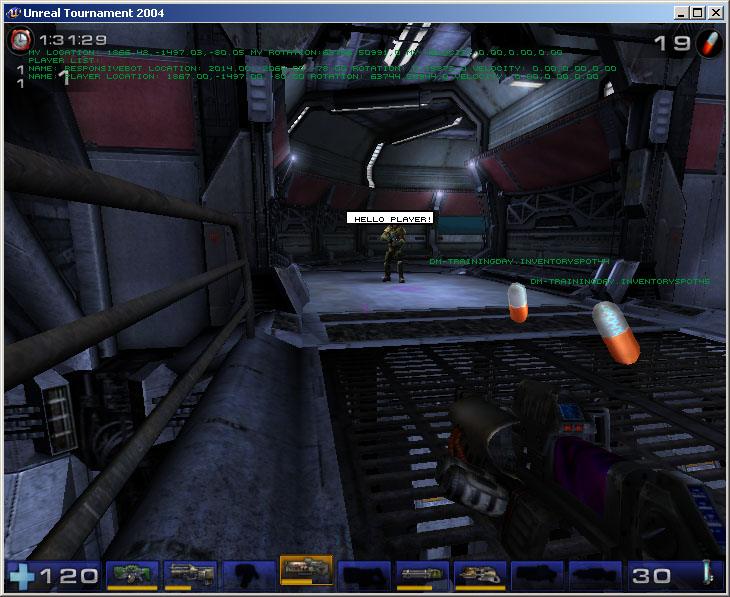
Before we will inspect the source code we will observe bot's behavior in game:
-
Start UT.
-
If you are in spectator mode (this will happen if you start UT from Netbeans) then press Esc and click button, now you are connected as a standard player.
-
Find the bot and move close to him, these messages will be printed:
-
"Hello {YOUR_NAME}!"
-
"What do you want {YOUR_NAME}?"
-
-
Now bump to the bot, he will move away from you.
-
If you do not have any weapon then find some and return back to the bot (you can switch between multiple weapons using mouse wheel or number keys on your keyboard).
-
Shoot the bot, he will move to avoid the fire.